Week 5: 3d Scanning and Printing
Wednesday 24/02/16 I had pretty constructive feedback from Louis who stressed some good points about my soldering and gave me good tips especially on how to remove items from a board. It is useful to know that I can fill items similar to the microcontroller with solder on all feet and this can make them come off more easily.
Neil spoke about the big discussions around 3d printing and how such printers have existed since the 1970’s, but they are only just becoming popular. He also said that out of all the things one can do in a Fab Lab, to 3d print is just about the rarest of all. After the end of this week I understand why!
On Thursday 25/02/16 Cecilia demonstrated the use of the Ultimaker and gave us some notes on how to print. The actual demonstration did not go as planned because there seemed to be something wrong with the actual printer. It seemed to jump about 1cm to the left on at least three occasions. It is something that other people in other Fab Labs experienced as well and they tackled it by using a previous version of ‘Cura’. Thursday was devoted to testing the limitations and possibilities of the scanners and printers as a group.
We proceeded to print three ‘obstacle courses’ AKA ‘tolerance tests’ on the ‘pb’ printer like the ones you can download from thingiverse. One was 30mm, the other 35mm and the fourth 45mm. We mostly played with the size and speed but none of them turned out to be up to standard. It did appear that the larger we printed, the better detail we got, which one could argue that was expected. The resolution was of very bad quality indeed.
What I understood from those tests is that of course every case and every size is different but the important thing is to concentrate on finding the balance in the following categories:
- Generate enough support for the printout to stay on the printer bed until the end. Since the pb has a heated bed one would expect the work to remain stuck on it more easily but that was generally not the case. I have seen this happen on the ZMorph printers we have at University and we were forced to buy special sticky surface which you can find here.
- Get the temperature right so the filament gets molten to the right fluidity to maximize its performance.
- Most importantly get the temperature right so that every previous layer has the chance to solidify before the next one is applied over it.
If any of the above settings are not regulated correctly you will most likely end up with a blob of amorphous plastic.
Thursday was also a day for playing around with 3d scanners. As a group we proceeded to scan each other with a ‘Kinect’ and some of us also used the ‘Sense’ handheld scanner by ‘3d Systems’.
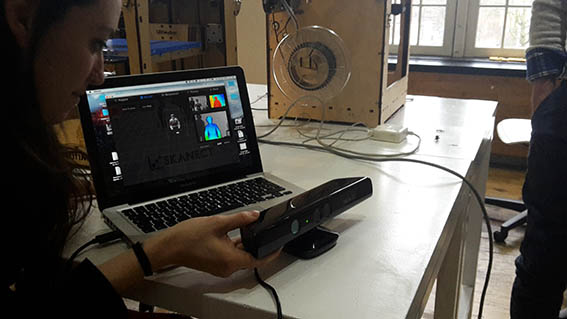

The 3d Systems one was very responsive when it came to scanning large objects or people but it was almost impossible to use it to successfully scan something smaller like a mug, a clothes peg or a stapler. I even used a rotating base and cleared the background before every attempt at scanning.
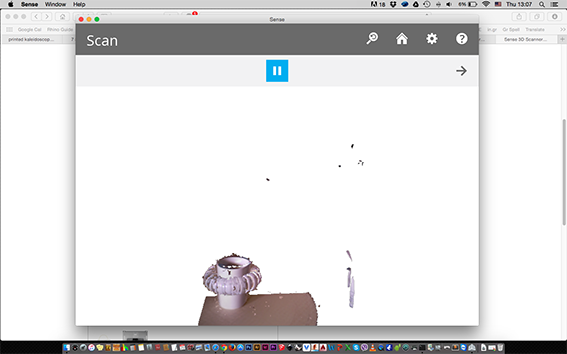
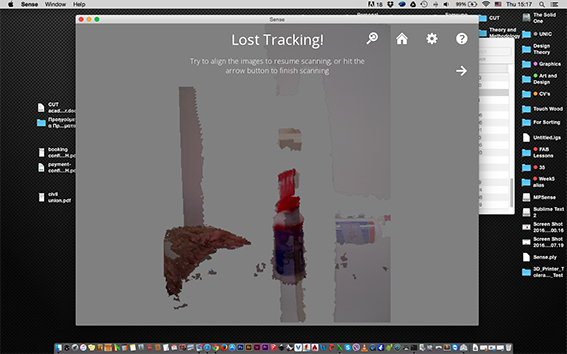
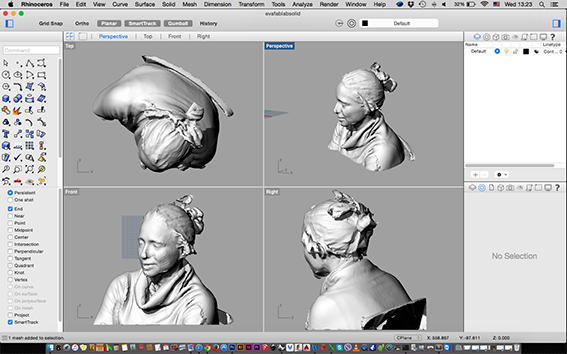
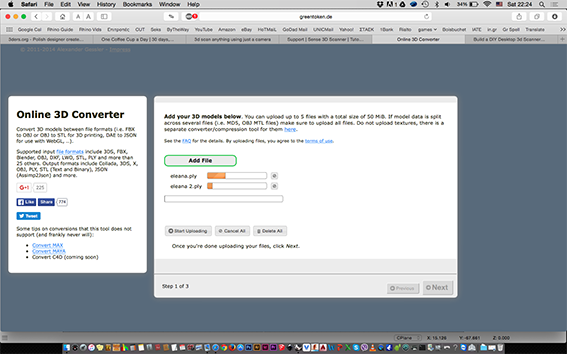
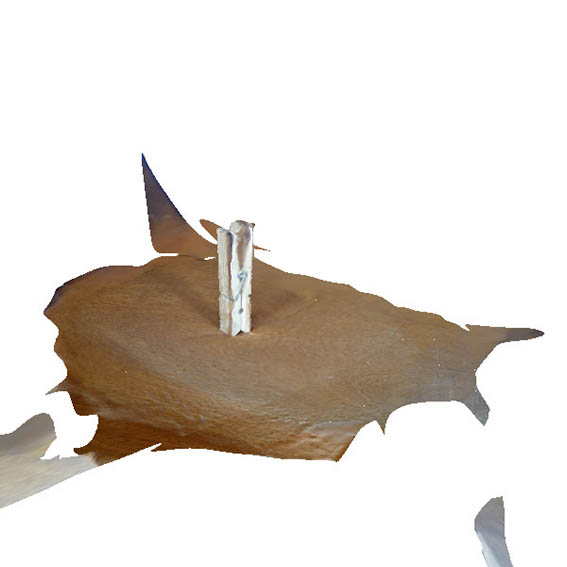
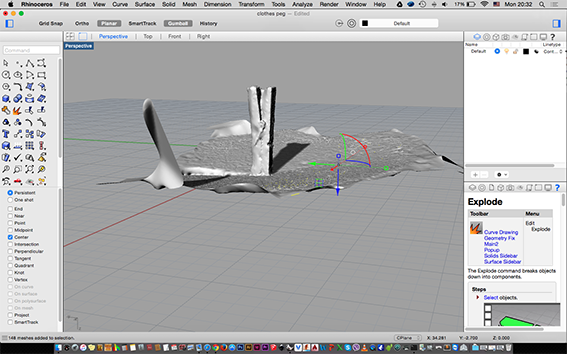
At some point I thought it was a mac computer issue because I kept losing track of the scan, but my colleagues had scanned successfully from pc’s. Then I proceeded to scan a person with the mac and succeeded and parallel to that I used a pc to scan a stapler. The results were the same, which lead me to believe that it had nothing to do with the software and everything to do with the size of the item to be scanned. I tried to work this out by selecting the ‘scan small object’ option mut this was unsuccesful. I did manage to have a good scan of myself, however, which I proceeded to print later in the week. Another issue worthy of mentioning, was that the particular scanner produces a .ply document, which is a little difficult to convert. I tried two online converters but none of them worked. When Emma just swapped the extension to .stl we managed to open the file of a scanned apple but it was a trick that was not always successful. I also scanned an image of a clothes peg with my android phone using ‘123D Catch’ Although it appears that 3d scanning has progressed a lot, it still has a very long way to go in order to become accurate.
I spent most of Friday 26/02/16 thinking and trying to understand exactly what ‘not made subtractively’ meant! I had a lot of things that I wanted to print but I was not really sure if they fit the description. According to http://www.sirlin.net, ‘Subtractive design is the process of removing imperfections and extraneous parts in order to strengthen the core elements. You can think of a design as something you build up, construct and let grow, but it’s pruning away the excess that gives a design a sense of simplicity, elegance, and power’
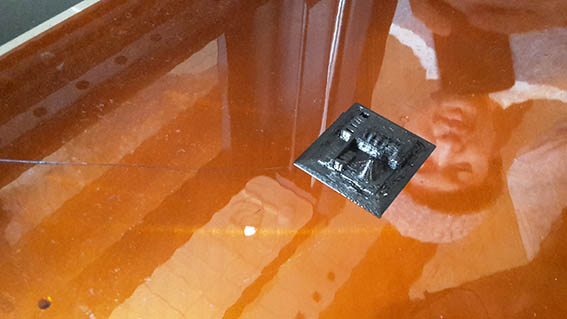
On Saturday 27/02/2016 I played around with ideas of what to make and I scaled down the bottom part of my insense burner model to give myself a first project to 3d print. I chose it because it would be tricky to make in a three axis cnc, with the operator having to rotate it in order to achieve the best shape. As a plus, I would try to 3d print my hinges and put the two parts of it together.
On Sunday 28/02/16 I worked with some more shapes in Rhino in an attempt to make a ‘spider-web-like’ construction with the subtraction of solids. This only spectacularly highlighted how much more I have to learn in Rhino. Also, in the end I believe that there are a bunch of ways to make anything and one cannot say with certainty that anything can or cannot be made additively or subtractively. In any case there are easier and more difficult ways to produce something, either by hand or with the help of technology.
Monday 29/02/16: I went in to have a proper play with the 3d printers and I started with the ‘pb’ which had a more promising image than the ‘Ultimaker’! I started by printing a scan of myself, which my colleague Paul helped me to produce (I wish I had gone to the hairdresser's for this). The settings I used for the 1,75 PLA filament were 60C for the heated bed and 210C, which seemed to work just fine. I was really surprised about the final quality of my printout where it reproduced my clothes but I was very disappointed at the outcome of my face. I think it is related to the quality of the scan but also to the fact that the face needed more printing support. I really had to work on it with hand tools to make it more convincing and that is really not what you would expect from a 3d print, is it?
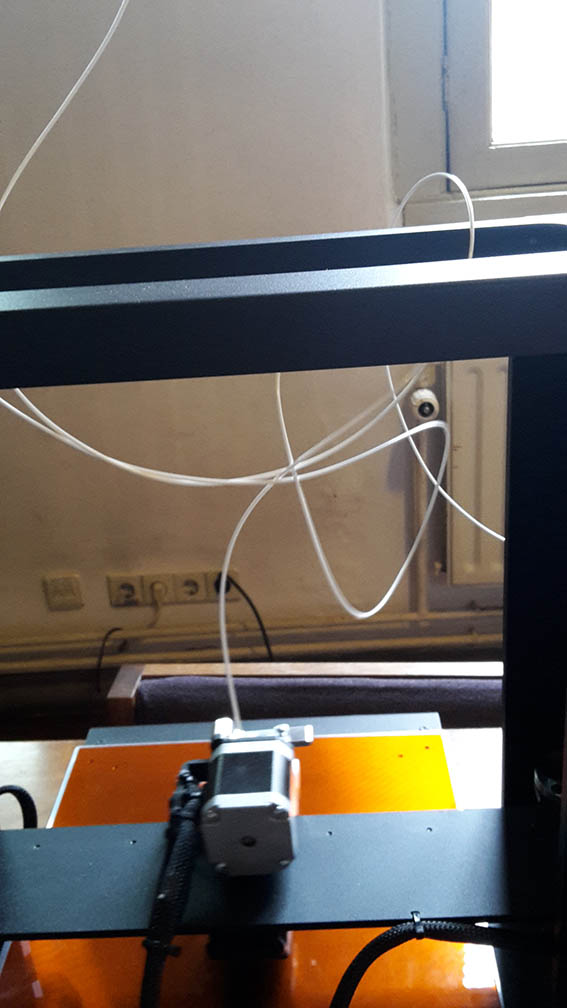
At this point I identified the spooler of the filament to be it’s biggest disadvantage, not only when it comes to the two people it needs to carry it around, but also because it just does not hold the filament in place. It unwinds, it twists, it tangles and it needs constant monitoring.
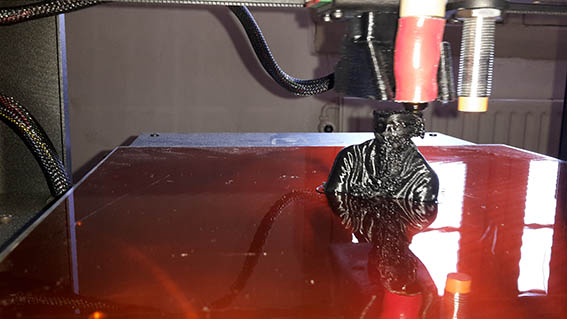
After finishing with the printing of myself, I moved to the Ultimaker to print my incense burner because my colleagues wanted to use the ‘pb’ printer.
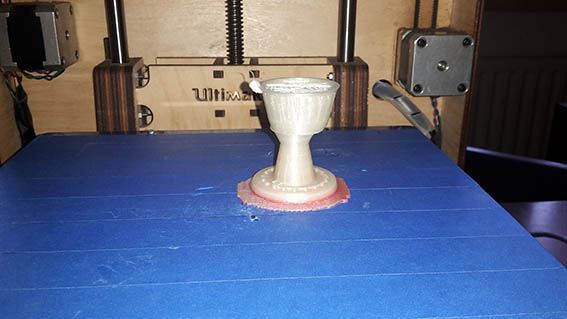
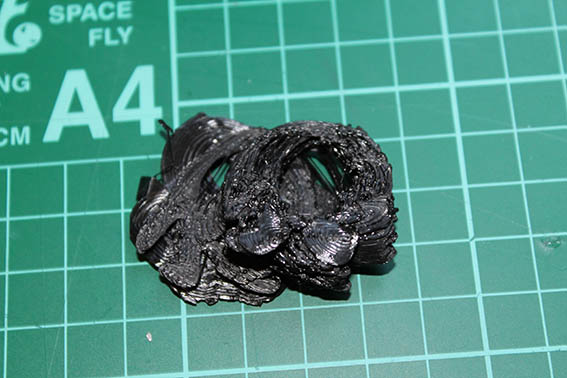
While everything seemed to be going smoothly and the plastic incense burner was progressing, my colleague Jacopo realized that the base plate of the Ultimaker must have moved because it was being printed in an off balance way. In any case, I left it to continue because I was really curious to see the final outcome and I was also thinking that I could cut the part that moved and re-glue it a few millimeters to the side. The outcome was definitely cute but it was not up to standard. The quality of the final product was not refined enough, which was highlighted by the fact that the base moved. I now understand that the filament that I was using was ABS, which is something that is usually not stocked in Fab Labs so not only was I using a material that was not recommended, I was also printing at 210C instead of 260C which is the most suitable temperature for ABS… I spent the night drawing a screw in Rhino because it seemed to be a more convincing option for this exercise. If I had time, I would return to re-print the lid and base of the incense burner.
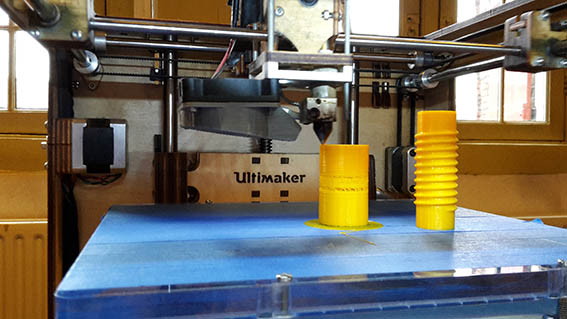
Tuesday 01/03/16 was a day full of 3d printing which started in a not so good way! I attempted to 3d print my screws. One version had the thread inside a tube and the other on the outside. By putting these parts together the idea was that I would get an extendable vase for a flower. At the bottom of the wide screw I had added a small sphere which would serve as the base of the vase. Then by screwing and unscrewing one would be able to make the vase longer or shorter. I started to print on the ‘pb’ printer which gave me quite good results during the printing of my scan. In this case, however, the three first attempts failed and they all seemed to stop at the same height. The printout became detached from the base almost at the same point on all occasions. To top it all up, the quality of the print was not smooth at all. Between the three attempts I changed the speed and temperature from 60-210C to 50-210C and then to 45-220C, which started to make a small difference until my third attempt became detached again. None of those were producing acceptable results and I was about to change the size and thickness of my platform adhesion when I realised that my colleague who was supposed to use it next arrived. To that moment I didn't know that I could use a layer of advesive liquid before starting to print with PLA… Two and a half hours had passed and I had nothing to show for my attempts at printing with the ‘pb’. I was disappointed that I was unable to work on it until I could figure it out, but I had to stop.
I moved to the Ultimaker, which was the only available machine at the time. I placed new masking tape on the base and proceeded to print the shape, which seemed simpler for me to complete. The screw with the thread on the outside. As I began I soon realised that I had a lot of issues. The masking tape was not placed carefully and it had overlaps, so the filament was not sticking on the bed properly. It also seemed brittle so with the help and advise of Emma we proceeded to replace it…

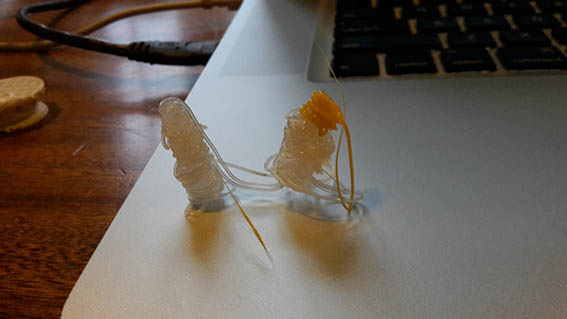
The fact that it was brittle got verified immediately because I barely touched it and it broke inside the tube. It took us quite some time to heat it up and add new filament behind it to push it. This is when we realized that it was ABS instead of PLA, something which is really toxic and is better not to be used in 3d Printing (it was the only thing I was using to print in Cyprus up to this moment). As soon as the old filament was extruded (through the computer) I was able to achieve a very accurate printout at 220C even for a piece that was quite tall.
I was relieved to be using the Ultimaker instead of the ‘pb’ because I am really not sure if it would easily stay in place. The fact that it does not have a heated bed worked to my advantage at this point. Some of my colleagues back in Cyprus would agree with the fact that the 2,85mm filament appeared to produce more accurate end results that the 1,75mm one, although I have to say that this theory does not really make much sense to me. It is the nozzle size that matters. An important detail is that ‘Cura’ froze on every printing session but managed to carry the printing through to the end. I was also very relieved by the way the Ultimaker filament is fixed at the back. It just works almost seamlessly.
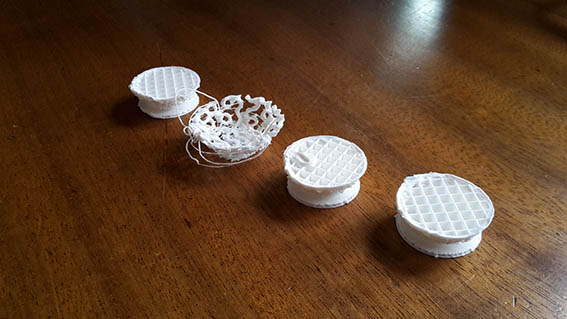
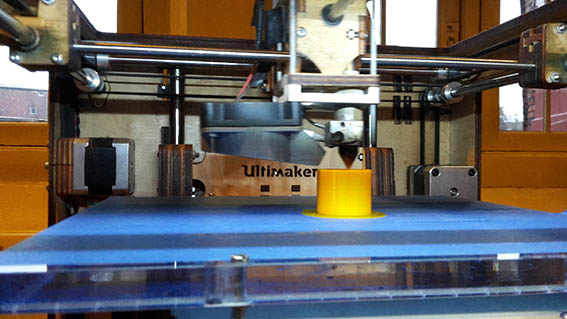
I slowly proceeded to print the second part of the screw, which seemed to be a little more demanding as a shape. At first it seemed to be going well but then it started to not be adding the amount of filament it was supposed to. Although I thought I had set it up to 220C degrees the printer said that it was producing 210C. That is something that did not make sense though, because it had been printing smoothly until then anyway. My screw was 2cm high already and I definitely did not want to stop and start all over. What I did was to push the filament manually for a few seconds until it seemed to be adding itself to the printout. This was not the end of my adventure, though, because it continued an almost spider-web-like printing for about 7mm and then I had to push the filament again. It then continued smoothly until the end but the centre section became really weak and broke at my first (failed) attempt to put the two screws together.
I cannot believe I did not test that the screws fit together before printing for more than five hours! One could really not get inside the other let alone reach the threads and function properly. By this time I was really running out of time so I quickly scaled my drawing by 1mm and proceeded to print until it was time to be kicked out of the Fab Lab! I now have a set of two screws which are supposed to nest inside each other but the sizes are wrong!

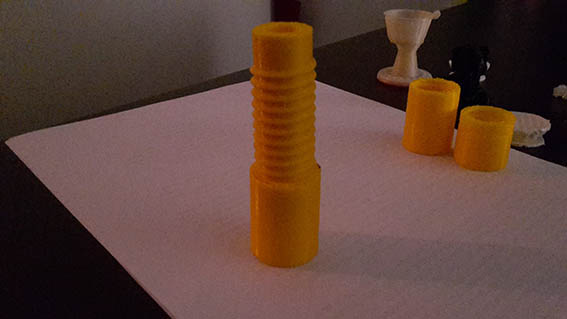
During the local review and after talking to Emma, I understood that I was printing with a 1,2mm nozzle. The offset that I did on the screw was only 1mm larger than the screw that is supposed to nest inside it, so the measurements of the final outcome were wrong! It could not be accurate since the nozzle was producing a 0,2 larger components than what I had designed! I hope I will have time to fix the drawing and re-print soon. It is amazing how many parameters need to be taken into account in order to get a correct and accurate 3d print!
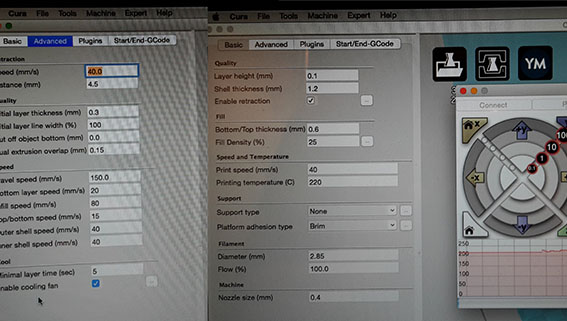
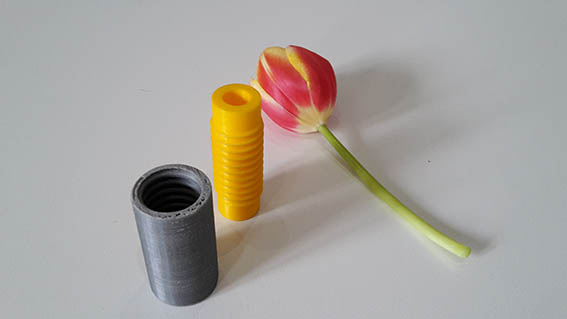
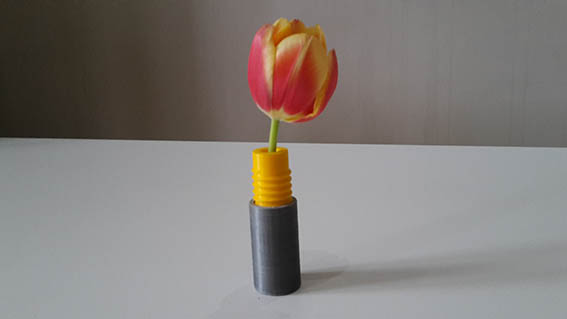
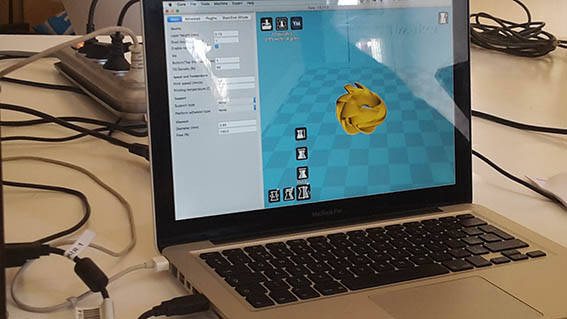
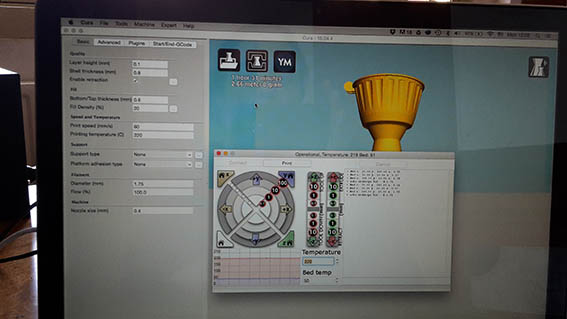
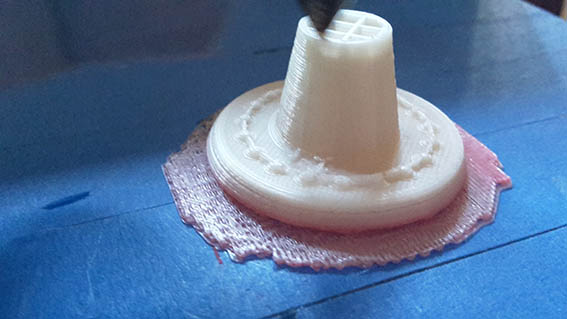
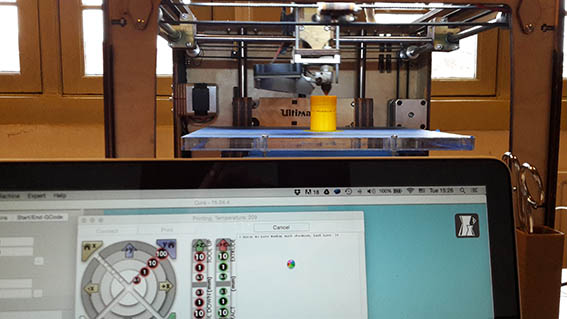
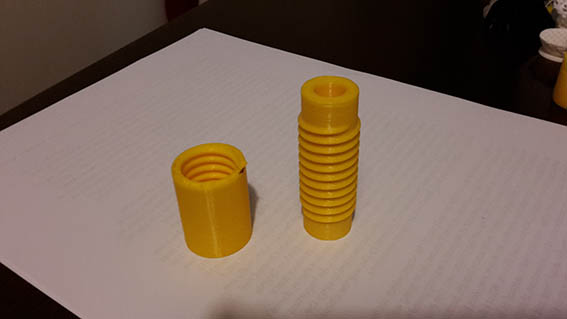
A few weeks later, I have the results that I wanted. Extendable flower pots to suit the length of your flower! I used the settings in the image above and I scaled the female part by 2mm and they now fit together. Putting them into each-other is little tight only when they reach the center of the tube. I am not at all sure about the cause of but it seems that the more I practice putting them together, the better they seem to work. I believe they are wearing into each-other. I also tried to put water in it which was a failure because it seems that the walls of the female part are too thin and as a result the water leaks out. If I were to do it again I would make the walls a little thicker. All in all, my vase mostly works and it mostly looks beautiful so I will settle with that for a week’s project!
Flower Pot Design File Insense burner and clothes peg scan 3d Printing and Scanning Lecture Back to Weekly Assignments Home